Hey there, fellow DIY enthusiasts and glass craft lovers! I'm stoked to share with you one of my favorite techniques: creating a gradient frosting effect with glass frosting powder. As a glass frosting powder supplier, I've seen firsthand how this simple ingredient can transform ordinary glass into a work of art. So, let's dive right in and learn how to achieve that stunning gradient look!
What You'll Need
First things first, let's gather all the supplies you'll need for this project. Don't worry; it's not a long list, and most of these items can be easily found at your local craft store or hardware shop.
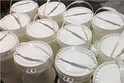
- Glass Frosting Powder: Of course, you'll need a good quality glass frosting powder. I recommend our High-end Ware Bottle Jar Frosting Powder, which is specially formulated to give a smooth and even finish.
- Water: To mix the frosting powder into a paste.
- Paintbrushes: Different sizes of paintbrushes will come in handy for applying the frosting paste. A small brush for detailed work and a larger one for covering bigger areas.
- Masking Tape: This will help you create clean lines and control the gradient effect.
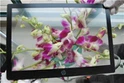
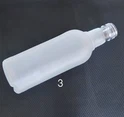
- Glass Surface: You can use any glass object you like, such as a vase, a jar, or a window pane. For inspiration, check out our Big Oil Sand Effect Glass Vase.
- Gloves and Safety Goggles: Frosting powder can be irritating to the skin and eyes, so it's important to protect yourself.
Preparing the Glass
Before you start applying the frosting powder, you need to make sure the glass surface is clean and dry. Any dirt, dust, or fingerprints can affect the final result. Wash the glass with warm, soapy water, and then rinse it thoroughly. Dry it with a clean, lint-free cloth.
Once the glass is clean, you can use masking tape to create the shape or pattern you want for your gradient. For example, if you're frosting a vase, you can tape off the top and bottom to create a band in the middle where the gradient will be. Make sure the tape is firmly pressed down to prevent the frosting paste from seeping under it.
Mixing the Frosting Powder
Now it's time to mix the frosting powder with water to create a paste. The ratio of powder to water will depend on the brand of frosting powder you're using, so make sure to follow the instructions on the package. Generally, you'll want to add water slowly to the powder and stir it well until you get a smooth, creamy consistency.
I like to use a small container for mixing, like a plastic cup or a disposable bowl. This makes it easy to clean up afterward. And don't be afraid to experiment with the consistency a bit. If the paste is too thick, it might be difficult to spread evenly. If it's too thin, it might run and not give you the desired effect.
Applying the Gradient
Once you have your frosting paste ready, it's time to start applying the gradient. I like to start with the lightest shade at the top or bottom of the glass, depending on how I want the gradient to flow. Dip your paintbrush into the paste and apply it in a thin, even layer. You can use short, smooth strokes to cover the area.
As you move down or up the glass, gradually add more frosting powder to the remaining paste to make it darker. This will create the gradient effect. You can also use a dry brush to blend the different shades together for a more seamless look.
Work in small sections at a time, and make sure to let each layer dry before applying the next one. This will prevent the paste from smudging and give you a more defined gradient. You can check if the layer is dry by gently touching it with your finger. If it feels dry to the touch, you're good to go.
Removing the Masking Tape
Once you've applied all the layers of the gradient and they're completely dry, it's time to remove the masking tape. Be careful when doing this, as you don't want to peel off any of the frosting. Slowly and gently pull the tape off at a 45-degree angle.
If you notice any areas where the frosting has seeped under the tape, you can use a small knife or a razor blade to carefully scrape it off. Just be careful not to scratch the glass.
Finishing Touches
After removing the masking tape, you can give your glass object a final once-over to make sure everything looks good. If there are any rough edges or uneven spots, you can use a fine-grit sandpaper to smooth them out. Just be gentle and don't sand too hard, as you don't want to damage the frosting.
You can also add some decorative elements to your frosted glass, like stickers, ribbons, or beads. This will give it a personal touch and make it even more unique. For more ideas on how to use frosted glass in interior home decoration, check out our Satin Effect Surface Of Glass in Interior Home Decoration.
Tips and Tricks
- Practice on a Scrap Piece of Glass: Before you start working on your final project, it's a good idea to practice the gradient technique on a scrap piece of glass. This will help you get a feel for how the frosting powder works and allow you to experiment with different shades and application methods.
- Work in a Well-Ventilated Area: Frosting powder can release fumes, so it's important to work in a well-ventilated area. Open a window or use a fan to circulate the air.
- Clean Your Brushes Immediately: After using the frosting paste, clean your paintbrushes right away. The paste can dry quickly and harden on the brushes, making them difficult to clean later.
Conclusion
Creating a gradient frosting effect with glass frosting powder is a fun and easy way to add a touch of elegance to any glass object. Whether you're making a gift for a friend or sprucing up your own home decor, this technique is sure to impress.


As a glass frosting powder supplier, I'm always here to help you with any questions or concerns you might have. If you're interested in purchasing our high-quality frosting powder or want to learn more about our products, feel free to reach out to us. We're happy to assist you with your next glass craft project.
So, what are you waiting for? Grab some glass frosting powder and start creating your own beautiful gradient designs today!
References
- Glass Frosting Powder Manufacturer's Instructions
- DIY Glass Crafting Magazines