Etching glass with ordinary glass etching powder is a fascinating process that can transform plain glass into a work of art. As a supplier of high - quality Ordinary Glass Etching Powder, I'm excited to share the step - by - step guide on how to achieve beautiful glass etching results.


Step 1: Gather Your Materials
Before you start the glass - etching process, you need to collect all the necessary materials. Here's a list of what you'll need:
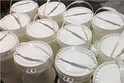
- Glass Etching Powder: Of course, you'll need our top - notch Glass Etching Powder. Our powder is formulated to provide a consistent and high - quality etching effect.
- Water: To mix with the etching powder to create the etching solution.
- A Container: A non - reactive container, such as a plastic or glass bowl, to mix the etching powder and water.
- A Brush or Sponge: For applying the etching solution to the glass surface.
- Protective Gear: This includes gloves, safety goggles, and a mask. Glass etching powder can be harmful if it comes into contact with your skin, eyes, or if inhaled.
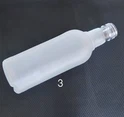
- Glass Object: You can choose any glass item you want to etch, such as a Lime Soda Peach Drink Bottle Beverage Glass Bottle Wine Bottle With Special Efection. Make sure the glass is clean and dry before you start.
Step 2: Prepare the Workspace
It's crucial to set up a proper workspace for glass etching. Choose a well - ventilated area, preferably outdoors or in a room with good air circulation. Lay down some newspapers or a plastic sheet to protect the surface from spills. Place all your materials within easy reach so that you can work efficiently.
Step 3: Mix the Etching Solution
Put on your protective gear before handling the glass etching powder. Carefully measure the required amount of Glass Etching Powder according to the instructions on the package. Usually, you'll need to mix the powder with water in a specific ratio. Slowly add the powder to the water in the non - reactive container, stirring continuously with a non - metal utensil. Stir until the powder is completely dissolved, and you have a smooth, homogeneous solution.
Step 4: Design Your Etching
If you have a specific design in mind, you can create a stencil. You can use stencil paper, vinyl, or even masking tape to create your design. Cut out the shape or pattern you want to etch on the stencil material. Then, carefully apply the stencil to the clean and dry glass surface. Make sure the stencil adheres well to the glass to prevent the etching solution from seeping under it.
Step 5: Apply the Etching Solution
Dip your brush or sponge into the etching solution. Gently apply the solution to the exposed areas of the glass (the areas not covered by the stencil). Make sure to apply an even layer of the solution. You can use multiple coats for a deeper and more pronounced etching effect, but allow each coat to dry for a few minutes before applying the next one.
Step 6: Let the Etching Solution Work
The etching process takes time. Depending on the type of glass and the desired etching depth, you may need to let the solution sit on the glass for 5 - 15 minutes. Check the glass periodically to see the progress of the etching. You can use a damp cloth to wipe away a small area and inspect the result.
Step 7: Rinse and Clean the Glass
Once the etching is complete, carefully remove the stencil from the glass. Immediately rinse the glass under running water to remove all traces of the etching solution. Use a mild detergent and a soft cloth to clean the glass thoroughly. This will ensure that no residual etching solution remains on the glass, which could cause further damage or affect the appearance of the etched design.
Step 8: Dry and Inspect the Glass
Pat the glass dry with a clean towel. Inspect the etched area to make sure the design is clear and the etching is even. If there are any areas that need further etching, you can repeat the process on those specific spots.
Troubleshooting and Tips
- Uneven Etching: This can be caused by an uneven application of the etching solution or an improper stencil. Make sure to apply the solution evenly and that the stencil is firmly attached to the glass.
- Stencil Residue: If there is some residue left on the glass after removing the stencil, you can use a stencil remover or rubbing alcohol to clean it off.
- Etching Too Shallow: If the etching is not deep enough, you can try increasing the application time of the etching solution or applying an additional coat.
Other Glass Etching Options
In addition to using glass etching powder, you may also consider Chemical Glass Etching Solution. This solution can offer different etching effects and may be more suitable for certain types of glass or designs.
Conclusion
Etching glass with ordinary glass etching powder is a rewarding and creative process. With the right materials, proper safety precautions, and following these steps, you can achieve beautiful and unique glass - etching results. Whether you're a hobbyist looking to create personalized gifts or a professional in the glass - art industry, our Glass Etching Powder is the perfect choice for your projects.
If you're interested in purchasing our high - quality glass etching powder or have any questions about the glass - etching process, we'd love to hear from you. Contact us to start a procurement discussion and take your glass - etching projects to the next level.
References
- Glass Etching Handbook: A Comprehensive Guide to Glass Decoration Techniques.
- Professional Glass Art Journal: Articles on Glass Etching Methods and Materials.