Achieving a smooth etching finish with glass etching powder is a meticulous process that combines artistry and science. As a supplier of high - quality glass etching powder, I've witnessed the transformative power of this product in the hands of both novice crafters and seasoned professionals. In this blog, I'll share in - depth insights on how to obtain that flawless, smooth etching on glass surfaces.
Understanding the Basics of Glass Etching Powder
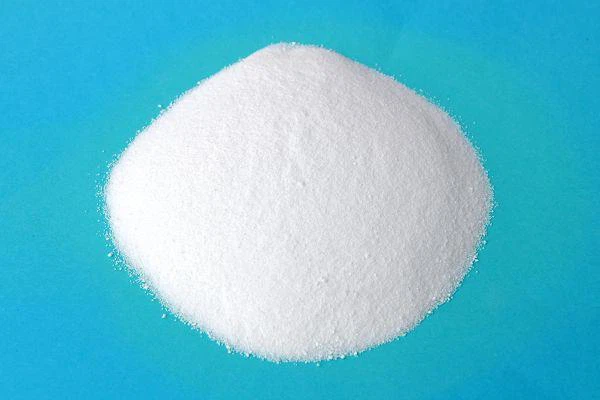
Before delving into the process, it's crucial to understand what glass etching powder is and how it works. Glass etching powder is a chemical compound designed to react with the surface of glass, creating a frosted or etched appearance. The powder typically contains substances like hydrofluoric acid salts, which are highly effective in breaking down the silica in the glass.
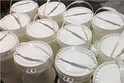
The key to a smooth finish lies in the quality of the etching powder. Our Material For Frosted Glass Decoration is formulated to ensure a consistent and even reaction with the glass surface. High - quality powder means fewer impurities, which can lead to a more uniform etching and a smoother end result.

Preparing the Glass Surface
The first step in achieving a smooth etching finish is proper surface preparation. Any dirt, grease, or fingerprints on the glass can interfere with the etching process, resulting in an uneven finish. Start by thoroughly cleaning the glass with a glass cleaner and a lint - free cloth. Make sure to remove all residues, as even the slightest bit of debris can cause imperfections in the etching.
After cleaning, it's advisable to dry the glass completely. A hair dryer on a low, cool setting can be used to ensure there are no water droplets left on the surface. Additionally, if the glass has any sharp edges, it's a good idea to sand them lightly to prevent any accidental cuts during the etching process.
Creating a Stencil
A stencil is an essential tool for achieving a smooth and precise etching. You can create a stencil using various materials, such as adhesive vinyl or contact paper. If you're using adhesive vinyl, you can cut your design using a cutting machine like a Cricut or Silhouette. For a more traditional approach, you can draw your design on contact paper and cut it out by hand.
Once you've created your stencil, carefully apply it to the cleaned glass surface. Make sure there are no air bubbles or wrinkles in the stencil, as these can cause uneven etching. Use a squeegee or a credit card to smooth out the stencil and ensure good adhesion. The edges of the stencil should be clean and sharp to prevent the etching powder from seeping under and creating a blurred effect.
Mixing the Glass Etching Powder
The correct mixing of the glass etching powder is critical for a smooth finish. Follow the manufacturer's instructions carefully when mixing the powder with water or other recommended solvents. The ratio of powder to liquid is usually specified on the product packaging, and it's important to adhere to these guidelines.
Use a plastic or glass container to mix the etching powder. Avoid using metal containers, as the chemicals in the powder can react with the metal and contaminate the mixture. Stir the mixture thoroughly until it forms a smooth, homogeneous paste. A whisk or a spatula can be used to ensure there are no lumps in the mixture.
Applying the Etching Mixture
When applying the etching mixture to the glass, it's important to work in a well - ventilated area, as the fumes from the chemicals can be harmful. Use a brush or a sponge to apply the mixture evenly over the exposed areas of the glass (the areas not covered by the stencil). Apply the mixture in a thin, consistent layer, making sure to cover all parts of the design.
Start from one end of the design and work your way across, applying gentle pressure to ensure the mixture reaches all areas of the glass. Avoid applying too much pressure, as this can cause the stencil to shift or the mixture to seep under the edges. The thickness of the applied layer should be uniform to prevent uneven etching.
Timing the Etching Process
The duration of the etching process is another crucial factor in achieving a smooth finish. Different glass etching powders have different recommended etching times, which are usually specified on the product label. Set a timer and closely monitor the etching process.
Leaving the etching mixture on for too long can result in an overly deep and rough etching, while removing it too soon may not etch the glass enough. Check the progress of the etching periodically by carefully wiping a small area of the mixture with a damp cloth. Once the desired level of etching is achieved, immediately rinse the glass with plenty of water to stop the reaction.
Post - Etching Cleaning
After rinsing the glass, carefully remove the stencil. Use a plastic scraper or your fingers to peel off the stencil, starting from one corner. Be gentle to avoid scratching the etched surface. Once the stencil is removed, wash the glass again with mild soap and water to remove any remaining etching powder residue.
Dry the glass with a lint - free cloth. You may notice some fine particles or residue on the etched surface. To achieve an even smoother finish, you can use a fine - grit sandpaper or a polishing compound to gently buff the etched areas. This will help to remove any minor imperfections and give the glass a more polished look.
Troubleshooting Common Issues
Even when following all the steps correctly, you may encounter some issues during the glass etching process. One common problem is uneven etching, which can be caused by uneven application of the etching mixture, air bubbles under the stencil, or impurities on the glass surface.
If you notice uneven etching, you can try reapplying the etching mixture to the areas that need more etching. However, be careful not to over - etch the glass. Another issue is a rough or grainy finish, which can be due to improper mixing of the etching powder or using a powder with low quality. In this case, it's advisable to use a higher - quality Glass Etching Chemical and ensure proper mixing.
Advanced Techniques for a Smoother Finish
For those looking to take their glass etching to the next level, there are some advanced techniques that can be employed. One such technique is multiple etching. This involves applying the etching mixture in multiple thin layers, allowing each layer to dry slightly before applying the next. This can result in a more controlled and smoother etching.
Another technique is using a resist material in addition to the stencil. A resist can be applied around the edges of the stencil to further prevent the etching powder from seeping under. This can help to create a cleaner, more defined edge and a smoother overall finish.
Conclusion
Achieving a smooth etching finish with glass etching powder requires careful preparation, precise application, and attention to detail. By following the steps outlined in this blog, you can create beautiful, professional - looking etched glass pieces.
If you're interested in purchasing high - quality glass etching powder or learning more about Etching Glass with Chemicals, please feel free to reach out to us. We're here to provide you with the best products and advice to help you achieve your glass etching goals. Contact us today to start a discussion about your specific needs and how we can assist you in your projects.
References
- Manufacturer's instructions for glass etching powder products.
- Various glass - crafting books and online resources on glass etching techniques.