Creating a stencil for glass etching with glass etching chemicals is an art that combines creativity and technical know - how. As a supplier of high - quality Glass Etching Chemicals, I'm excited to share with you the step - by - step process of creating a stencil for this beautiful craft.
Why Use a Stencil in Glass Etching?
Before we dive into the process of creating a stencil, let's understand why it's so important. A stencil acts as a mask that protects certain areas of the glass from the etching chemicals. This allows you to create precise and detailed designs on the glass surface. Whether you're making decorative glassware, signage, or art pieces, a well - made stencil is the key to achieving professional - looking results.
Materials Needed
To create a stencil for glass etching, you'll need the following materials:
- Design Source: This could be a printed image, a hand - drawn design, or a digital graphic. Make sure the design is high - contrast and suitable for your glass etching project.
- Stencil Material: There are several options for stencil materials, such as vinyl, contact paper, or stencil film. Vinyl is a popular choice because it's durable and easy to cut.
- Cutting Tool: You can use a craft knife for simple designs, or a cutting machine like a Cricut or Silhouette for more complex and detailed patterns.
- Transfer Tape: This helps you transfer the stencil from the backing paper to the glass surface.
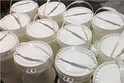
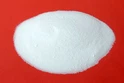
- Our Glass Etching Chemicals: We offer a range of high - quality products like YK - I Glass Etching Powder and Glass Etching Powder, which are designed to give you excellent etching results.
Step 1: Choose Your Design
The first step in creating a stencil is to choose a design. You can search for free or paid designs online, or create your own. If you're using a digital design, make sure it's in a format that your cutting machine can read, such as SVG or DXF.
Step 2: Prepare the Stencil Material
Cut a piece of your chosen stencil material to a size that's slightly larger than your design. If you're using vinyl, make sure it's clean and free of any dust or debris. You can use a lint roller to remove any particles from the surface.
Step 3: Cut the Stencil
If you're using a cutting machine, load the stencil material into the machine according to the manufacturer's instructions. Import your design into the cutting software and adjust the settings for the type of material you're using. Then, let the machine do the cutting.
If you're using a craft knife, place your design on top of the stencil material and secure it with tape. Carefully cut along the lines of the design using the craft knife. This method requires more patience and precision, but it can be a great option for simple designs.
Step 4: Weed the Stencil
After cutting, you'll need to "weed" the stencil. This means removing the excess stencil material that you don't need. Use a pair of tweezers or a weeding tool to carefully lift and remove the unwanted pieces. Be gentle to avoid tearing the stencil.
Step 5: Transfer the Stencil to the Glass
Apply transfer tape to the surface of the stencil. Rub the transfer tape firmly with a squeegee or a credit card to make sure it adheres well to the stencil. Then, carefully peel the stencil and transfer tape from the backing paper.
Place the stencil on the glass surface where you want to etch. Make sure it's aligned correctly and smooth out any bubbles or wrinkles. Rub the transfer tape again to ensure good contact between the stencil and the glass. Finally, peel off the transfer tape, leaving the stencil on the glass.
Step 6: Apply the Glass Etching Chemical
Now it's time to apply the glass etching chemical. We recommend using our YK Glass Frosting Powder (water - based) for a safe and effective etching process.
Follow the instructions on the product label to prepare the etching solution. Use a brush or a sponge to apply the solution evenly over the exposed areas of the glass (the areas not covered by the stencil). Make sure to wear protective gloves and goggles during this process.
Let the etching solution sit on the glass for the recommended amount of time. This can vary depending on the product and the desired etching depth. After the time is up, rinse the glass thoroughly with water to remove the etching solution.
Step 7: Remove the Stencil
Once the glass has been rinsed and dried, carefully peel off the stencil from the glass surface. You should now see your beautifully etched design on the glass.
Tips and Tricks
- Test Your Design: Before applying the stencil to your final glass piece, test it on a scrap piece of glass. This allows you to make any necessary adjustments and ensure that the design looks the way you want it.
- Clean the Glass: Make sure the glass surface is clean and free of any oils or fingerprints before applying the stencil. You can use a glass cleaner and a lint - free cloth to clean the glass.
- Store Your Stencils: If you want to reuse your stencils, store them flat in a cool, dry place. You can place them between sheets of wax paper to prevent them from sticking together.
Contact Us for Your Glass Etching Needs
If you're interested in purchasing our high - quality glass etching chemicals or have any questions about the stencil - making process, we'd love to hear from you. Our team of experts is always ready to assist you with your glass etching projects. Whether you're a professional artist or a hobbyist, we have the products and knowledge to help you achieve amazing results.


References
- Glass Etching Techniques: A Comprehensive Guide. [Publisher Name], [Year]
- The Art of Stencil Making. [Author Name], [Year]