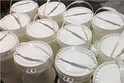
Hey there! I'm a supplier of Etching Powder For Glass, and I'm super stoked to share with you how to apply this etching powder evenly on glass. Whether you're a DIY enthusiast looking to add a personal touch to your glassware or a professional in the glass - art industry, getting that even etch is crucial for a top - notch finish.
Understanding the Basics of Glass Etching Powder
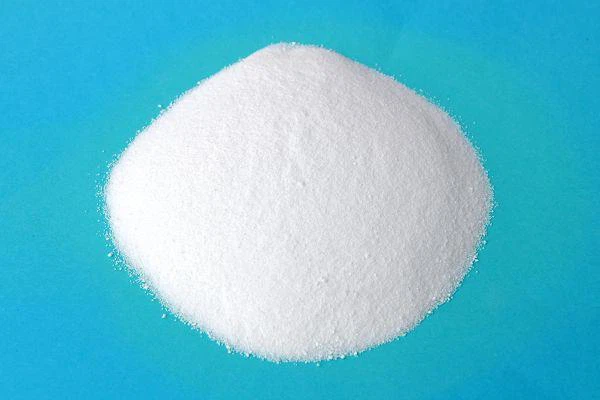
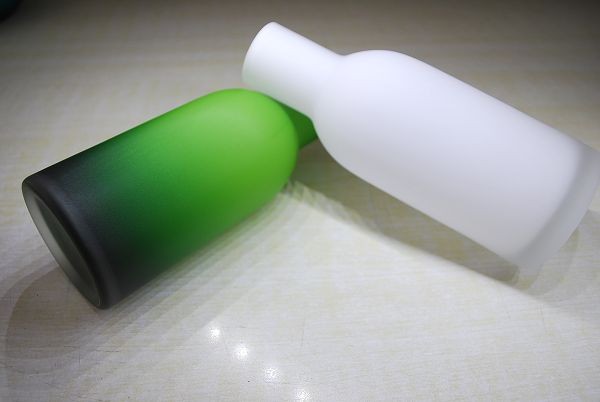
First things first, let's talk a bit about what glass etching powder is. It's a chemical compound that, when mixed with water or other solvents, creates a solution that can react with the surface of the glass. This reaction essentially "eats away" at the glass, creating a frosted or textured look. There are different types of etching powders out there, but the ones I supply are high - quality and designed to give you consistent results.
You can find more information about glass etching chemicals on this page: Glass Etching Chemical.
Preparing Your Workspace
Before you start applying the etching powder, you need to set up a proper workspace. Make sure you're in a well - ventilated area. The fumes from the etching solution can be pretty strong and harmful if inhaled in large quantities. I usually work in my garage with the door open or near a window.
Lay down some old newspapers or a plastic sheet to protect your work surface. You don't want to accidentally etch your table or countertop! Also, gather all the tools you'll need: a pair of rubber gloves, a paintbrush or a spray bottle, a container for mixing the etching powder, and of course, your glass item.
Preparing the Glass
The glass surface needs to be clean and free of any dirt, grease, or fingerprints. Wash the glass with warm, soapy water and then rinse it thoroughly. Dry it with a clean, lint - free cloth. If there are any stubborn stains or marks, you can use a glass cleaner. Just make sure to dry the glass completely before moving on.
Mixing the Etching Powder
Now, let's talk about mixing the etching powder. Read the instructions on the packaging carefully because different powders may have different mixing ratios. Generally, you'll want to add the powder to water in a container. Start by adding a small amount of powder to the water and stir it well with a stir stick. Keep adding the powder gradually until you get the right consistency.
The solution should be thick enough to stick to the glass but not so thick that it's difficult to apply. If it's too thin, it may run off the glass and create uneven etching. If it's too thick, it may clump up and also result in an uneven finish. You can check out more about chemical glass etching solutions here: Chemical Glass Etching Solution.
Applying the Etching Solution
There are a couple of ways to apply the etching solution, and the method you choose depends on the size and shape of your glass item and the design you want to achieve.
Using a Paintbrush
If you're going for a detailed design or etching a small area, a paintbrush is a great option. Dip the paintbrush into the etching solution and apply it to the glass in smooth, even strokes. Make sure to cover the area you want to etch completely. Don't press too hard on the brush, as this can cause the solution to spread unevenly. Work in small sections at a time, and try to keep the thickness of the solution layer consistent.
Using a Spray Bottle
For larger glass surfaces or when you want a more uniform etch, a spray bottle can be a better choice. Pour the etching solution into the spray bottle and give it a good shake. Hold the spray bottle about 6 - 8 inches away from the glass surface and spray in a sweeping motion. Move the bottle back and forth evenly to cover the entire area. Make sure to overlap your spray patterns slightly to avoid any bare spots.
Controlling the Etching Process
Once you've applied the etching solution, you need to let it sit on the glass for a certain amount of time. This is called the "etching time." Check the instructions on the powder packaging for the recommended etching time. It usually ranges from a few minutes to 15 minutes or more, depending on the type of powder and the effect you want.
During the etching time, don't touch the glass or the solution. The reaction between the solution and the glass is happening, and any disturbance can cause an uneven etch. You can keep an eye on the glass to see how the etching is progressing, but avoid breathing directly over the glass as the fumes can be irritating.
Removing the Etching Solution
After the etching time is up, it's time to remove the solution. Put on your rubber gloves again and carefully rinse the glass under running water. Use a gentle stream of water to wash away the etching solution. You can also use a soft sponge or cloth to gently wipe away any remaining solution. Make sure to get all the solution off the glass, as any residue can continue to etch the glass and create an uneven finish.
Post - Etching Care
Once the glass is clean and dry, you can inspect your work. If you're happy with the result, you're done! If there are any areas that need a bit more etching, you can repeat the process on those spots. Just make sure to wait for the glass to dry completely before reapplying the solution.
You can also add a protective coating to the etched glass if you want. There are special glass sealants available that can help protect the etched surface from scratches and wear.
Troubleshooting
Sometimes, things don't go as planned. Here are some common problems and how to fix them:
Uneven Etching
If you notice that the etching is uneven, it could be due to a few reasons. Maybe the solution was applied too thick in some areas and too thin in others. Or perhaps the etching time was inconsistent across the glass surface. To fix this, you can try to sand down the uneven areas gently with fine - grit sandpaper and then re - etch the glass.
Streaks or Lines
Streaks or lines can occur if the solution dries too quickly or if there were air bubbles in the solution when it was being applied. To prevent streaks, make sure the glass surface is at room temperature and the humidity in your workspace is not too low. If you already have streaks, you can try to buff them out with a glass polishing compound.
Conclusion
Applying etching powder for glass evenly takes a bit of practice, but with the right techniques and a bit of patience, you can achieve great results. I hope this guide has been helpful to you. If you're interested in purchasing high - quality Etching Powder For Glass, feel free to reach out to me. I'm always happy to answer any questions you may have and help you with your glass - etching projects. You can learn more about the chemical etching of glass from this page: Chemical Etching of Glass.
If you're looking to buy etching powder for your next project, don't hesitate to contact me for more details and to start a purchase negotiation. I'm here to make sure you get the best product for your needs.
References
- Manufacturer's instructions on the Etching Powder For Glass packaging.
- Personal experience from years of working with glass etching products.