What is the application process for glass frosting chemical on large glass surfaces?
As a seasoned supplier of glass frosting chemicals, I've witnessed firsthand the transformative power these substances have on large glass surfaces. The application of glass frosting chemicals is a meticulous process that combines artistry with science, resulting in stunning frosted glass that enhances both aesthetics and functionality. In this blog, I'll walk you through the step-by-step application process, sharing insights and tips based on my years of experience in the industry.
Step 1: Surface Preparation
The first and most crucial step in the glass frosting process is surface preparation. A clean and smooth surface is essential for the even application of the frosting chemical and to ensure a high-quality finish. Start by thoroughly cleaning the glass surface with a glass cleaner and a lint-free cloth to remove any dirt, dust, or grease. Pay special attention to the edges and corners of the glass, as these areas can accumulate debris.
After cleaning, inspect the glass for any scratches, chips, or imperfections. Minor scratches can be buffed out using a glass polishing compound, while more significant damage may require the glass to be replaced. Once the glass is clean and free of defects, it's ready for masking.
Step 2: Masking
Masking is the process of covering the areas of the glass that you don't want to be frosted. This is typically done using masking tape or a stencil. When using masking tape, make sure to apply it smoothly and evenly, pressing down firmly to ensure a tight seal. For more intricate designs, a stencil can be used. Stencils can be made from a variety of materials, such as vinyl or paper, and can be cut using a craft knife or a cutting machine.
When applying the stencil, align it carefully with the glass surface and secure it in place using tape or adhesive. Make sure there are no gaps or bubbles between the stencil and the glass, as this can cause the frosting chemical to seep under the stencil and create an uneven finish.


Step 3: Mixing the Frosting Chemical
Before applying the frosting chemical, it's important to mix it thoroughly according to the manufacturer's instructions. Most glass frosting chemicals come in a two-part formula that requires the base and the activator to be mixed together. Use a clean, dry container and a stir stick to mix the chemicals until they are well combined.
It's important to note that glass frosting chemicals are typically hazardous and should be handled with care. Wear protective gloves, goggles, and a respirator to avoid contact with the chemicals and inhalation of fumes. Work in a well-ventilated area to minimize exposure to the chemicals.
Step 4: Applying the Frosting Chemical
Once the frosting chemical is mixed, it's time to apply it to the glass surface. Use a brush, roller, or spray gun to apply the chemical evenly over the exposed areas of the glass. Make sure to apply a thick, even coat, but avoid over-applying the chemical, as this can cause drips and runs.
When using a brush or roller, start at the top of the glass and work your way down, applying the chemical in a smooth, consistent motion. When using a spray gun, hold the gun about 6-8 inches away from the glass surface and spray in a sweeping motion. Make sure to cover the entire surface evenly, but avoid spraying too close to the edges of the masking tape or stencil, as this can cause the chemical to seep under and create an uneven finish.
Step 5: Allowing the Frosting Chemical to Set
After applying the frosting chemical, allow it to set for the recommended amount of time according to the manufacturer's instructions. This typically takes between 10-30 minutes, depending on the type of chemical and the temperature and humidity of the environment.
During the setting process, avoid touching or disturbing the glass surface, as this can cause the frosting to become uneven or smudged. Once the chemical has set, it's time to remove the masking tape or stencil.
Step 6: Removing the Masking and Cleaning the Glass
Carefully remove the masking tape or stencil from the glass surface, starting at one corner and pulling it back slowly and steadily. Make sure to pull the tape or stencil at a 45-degree angle to avoid peeling up the frosting.
Once the masking is removed, use a clean, damp cloth to wipe away any excess frosting chemical from the glass surface. Rinse the glass thoroughly with water to remove any remaining chemicals and debris. Dry the glass with a lint-free cloth to reveal the beautiful frosted finish.
Step 7: Finishing Touches
After the glass is clean and dry, you can add some finishing touches to enhance the appearance of the frosted glass. For example, you can apply a clear coat of sealant to protect the frosting and give it a glossy finish. You can also add decorative elements, such as decals or paint, to create a unique and personalized look.
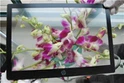
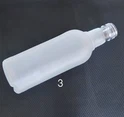
Some popular applications of frosted glass include Oil-Sand Effect Frosted Float Glass, Satin Effect Colored Glass Vase, and Manufacture Wine Frosted Glass Bottle Glass Factory. These products showcase the versatility and beauty of frosted glass and can be used in a variety of settings, such as homes, offices, and commercial spaces.
Conclusion
The application process for glass frosting chemical on large glass surfaces is a complex and precise process that requires careful preparation, attention to detail, and the use of high-quality materials. By following the steps outlined in this blog, you can achieve a beautiful and professional-looking frosted glass finish that will enhance the aesthetics and functionality of any space.
If you're interested in purchasing glass frosting chemicals or learning more about our products and services, please don't hesitate to contact us. We're here to help you achieve your vision and create stunning frosted glass that will make a lasting impression.
References
- Manufacturer's instructions for glass frosting chemicals
- Industry best practices for glass frosting
- Personal experience as a glass frosting chemical supplier