Hey there, fellow craft enthusiasts! I'm stoked to share with you all how to create a mind - blowing glittery effect using glass etching cream. As a supplier of top - notch Glass Etching Cream, I've seen firsthand the amazing transformations it can bring to glassware. So, let's jump right in!
What You'll Need
First things first, gather your supplies. Besides our high - quality Chemical Glass Etching Cream, you'll need some glass items. This could be anything from a simple glass vase to a set of wine glasses. You'll also need glitter of your choice. There are different types of glitter, like fine glitter for a more subtle look or chunky glitter for a bolder effect. Other essentials include a paintbrush or a sponge for applying the etching cream, masking tape to protect areas you don't want to etch, and a clean cloth for wiping.
Preparing the Glass
Before you start applying the etching cream, you need to prep the glass. Clean the glass thoroughly with soap and water to remove any dirt, grease, or fingerprints. A clean surface ensures that the etching cream adheres properly and gives you a smooth finish. Dry the glass completely using a lint - free cloth.
If you want to create a specific design, use masking tape to cover the areas you don't want to etch. You can get creative with the shapes and patterns. For example, you can make stripes, stars, or even write a message. Just make sure the tape is firmly pressed against the glass to prevent the etching cream from seeping underneath.
Applying the Glass Etching Cream
Now comes the fun part! Put on some gloves to protect your hands, as the etching cream is a chemical product. Dip your paintbrush or sponge into the Glass Etching Paste. Make sure to apply an even layer of the cream over the exposed glass areas. Don't be too thin or too thick; a medium - thick layer usually works best.
Work in small sections at a time to ensure that the cream doesn't dry out before you're done applying it. You can use a toothpick or a small tool to create texture or add details to the cream while it's still wet. For instance, you can make swirls or dots for a more unique look.
Adding the Glitter
Once you've applied the etching cream, it's time to add the glitter. Sprinkle the glitter evenly over the wet etching cream. The cream acts as an adhesive, holding the glitter in place. You can use one color of glitter or mix different colors for a more vibrant effect. Press the glitter gently into the cream to make sure it sticks well.
If you want a really thick layer of glitter, you can add more glitter after the first layer has started to dry a bit. Just make sure not to overdo it, as too much glitter can make the design look messy.
Letting It Dry
After adding the glitter, let the glass sit for the recommended drying time. This usually takes about 15 - 30 minutes, but it can vary depending on the type of etching cream you're using and the thickness of the layer. Avoid touching the glass during this time to prevent smudging the glitter.
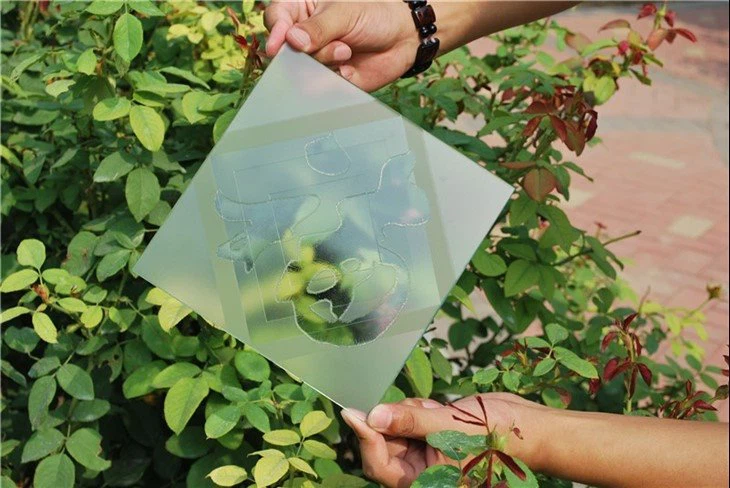
Once the cream is completely dry, carefully remove the masking tape. You'll be amazed at the beautiful, glittery design that's been created on the glass.
Cleaning Up
Clean any excess glitter from the glass using a soft brush or a cloth. You can also rinse the glass under running water to remove any loose glitter. Be gentle while cleaning to avoid scratching the etched surface.

Tips and Tricks
- Test on a small area first: Before you start working on a large glass item, test the etching cream and glitter on a small, inconspicuous area. This way, you can see how the combination looks and make any adjustments if needed.
- Store your supplies properly: Keep your etching cream and glitter in a cool, dry place. This will ensure that they stay in good condition for future projects.
- Experiment with different types of glass: Different types of glass may react slightly differently to the etching cream. Try using clear glass, frosted glass, or colored glass to see the different effects you can achieve.
Why Choose Our Glass Etching Cream
Our Glass Etching With Cream is a game - changer. It's formulated to give you a smooth, even etch every time. The cream is easy to apply, and it dries quickly, so you can see your results in no time. It's also safe to use when handled properly, and it's compatible with a wide range of glitter types.
Whether you're a professional crafter or just starting out, our glass etching cream is the perfect choice for creating stunning glittery effects on glass. It allows you to add a touch of glamour to any glass item, making it a great gift or a unique addition to your home decor.
Connect with Us
If you're interested in purchasing our Glass Etching Cream or have any questions about the product, we'd love to hear from you. Drop us a message, and our team will be more than happy to assist you. Whether you need a small quantity for a personal project or a large order for a business, we've got you covered. Let's create some amazing glittery glass masterpieces together!
References
- Crafting magazines and blogs for general glass - etching tips
- Manufacturer's instructions for our Glass Etching Cream products