As a supplier of ordinary glass etching powder, I'm often asked about the best ways to use stencils with this product. In this blog post, I'll share a detailed guide on how to effectively use a stencil with ordinary glass etching powder, along with some tips and tricks to achieve the best results.
Understanding the Basics of Glass Etching and Stencils
Before we dive into the process, it's important to understand what glass etching is and how stencils play a role. Glass etching is a technique that involves using chemicals to create a permanent, frosted design on the surface of glass. The etching powder we supply is a safe and effective alternative to traditional acid-based etching methods. Stencils, on the other hand, are templates that allow you to control where the etching powder is applied, creating precise and detailed designs.
Materials You'll Need
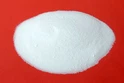
- Ordinary Glass Etching Powder: Our AG GALSS ETCING POWDER FOR ACID ETCHING GLASS PRODUCTION is a high-quality product that is easy to use and produces excellent results.
- Stencils: You can purchase pre-made stencils or create your own using materials such as vinyl or paper. Make sure the stencil is designed for glass etching and is the right size and shape for your project.
- Glass Surface: Choose a clean, smooth glass surface for your project. You can use a variety of glass items, such as windows, mirrors, or glassware.
- Protective Gear: Wear gloves, safety glasses, and a respirator to protect yourself from the etching powder and any fumes.
- Brushes or Applicators: Use a small brush or applicator to apply the etching powder to the glass surface.
- Water and a Sponge: You'll need water and a sponge to clean the glass surface before and after the etching process.
Step-by-Step Guide
Step 1: Prepare the Glass Surface
- Clean the glass surface thoroughly with water and a sponge to remove any dirt, dust, or grease. Make sure the glass is completely dry before proceeding.
- If the glass has any stickers or labels, remove them carefully using a razor blade or a sticker remover.
Step 2: Apply the Stencil
- Carefully place the stencil on the glass surface, making sure it is centered and aligned correctly. Use a squeegee or a credit card to smooth out any air bubbles or wrinkles.
- If you're using a vinyl stencil, you can use a transfer tape to help apply it to the glass surface. Simply place the transfer tape over the stencil, smooth it out, and then peel off the backing paper. Press the stencil firmly onto the glass surface and then peel off the transfer tape.
Step 3: Mix the Etching Powder
- Follow the instructions on the etching powder package to mix the powder with water. Usually, you'll need to mix a small amount of powder with a larger amount of water to create a thick paste.
- Stir the mixture thoroughly until it is smooth and free of lumps.
Step 4: Apply the Etching Powder
- Using a small brush or applicator, apply the etching powder paste to the exposed areas of the glass surface. Make sure to apply the paste evenly and cover the entire area of the stencil.
- Be careful not to apply the paste too thickly, as this can cause the etching to be uneven or blotchy.
- If you're etching a large area, you may need to apply the paste in sections to prevent it from drying out before you're finished.
Step 5: Let the Etching Powder Sit
- Let the etching powder sit on the glass surface for the recommended amount of time, as specified on the package. This usually ranges from 5 to 15 minutes, depending on the type of powder and the desired effect.
- During this time, the etching powder will react with the glass surface and create a frosted effect.
Step 6: Remove the Etching Powder
- After the recommended time has passed, use a sponge and water to carefully remove the etching powder from the glass surface. Make sure to rinse the glass thoroughly to remove all traces of the powder.
- If there are any stubborn areas of etching powder, you can use a soft brush or a toothbrush to gently scrub them away.
Step 7: Remove the Stencil
- Once the glass surface is clean and dry, carefully remove the stencil from the glass surface. You can use a razor blade or a pair of tweezers to lift the edges of the stencil and peel it off.
- If the stencil leaves any residue on the glass surface, you can use a glass cleaner or a rubbing alcohol to remove it.
Step 8: Clean and Polish the Glass
- Clean the glass surface again with water and a sponge to remove any remaining residue or debris.
- You can then polish the glass surface using a soft cloth or a glass polish to give it a shiny finish.
Tips and Tricks
- Test the Etching Powder: Before you start your project, it's a good idea to test the etching powder on a small, inconspicuous area of the glass surface to make sure you're happy with the results.
- Use a Masking Tape: If you're using a paper stencil, you can use masking tape to secure it to the glass surface and prevent the etching powder from seeping under the edges.
- Apply Multiple Layers: If you want a deeper or more pronounced etching effect, you can apply multiple layers of etching powder. Just make sure to let each layer dry completely before applying the next one.
- Clean the Tools: After you're finished using the etching powder, make sure to clean your tools thoroughly with water to prevent the powder from drying and hardening on them.
Conclusion
Using a stencil with ordinary glass etching powder is a fun and creative way to add a personal touch to your glass items. By following the steps outlined in this guide and using the right materials and tools, you can achieve professional-looking results in no time.


If you're interested in purchasing our Etching Glass Materials or Chemical Etching Materials For Glass Decoration, please don't hesitate to contact us for more information and to discuss your specific needs. We're always happy to help and look forward to working with you on your next glass etching project.
References
- Glass Etching Techniques Handbook, 2023 Edition
- DIY Glass Decorating: A Comprehensive Guide, 2022