Acid etching is a remarkable technique that has been used for centuries to transform ordinary glass into stunning works of art. One of the most sought-after effects in glass etching is the shadow effect, which adds depth, dimension, and a touch of mystery to the glass surface. As a leading supplier of Acid Etching for Glass, I am excited to share with you the step-by-step process of creating a shadow effect with acid etching for glass.
Understanding the Basics of Acid Etching
Before we dive into creating the shadow effect, it's essential to understand the fundamentals of acid etching. Acid etching is a process that uses acidic chemicals to remove the surface layer of glass, creating a frosted or textured appearance. The most commonly used acid for glass etching is hydrofluoric acid, which is highly corrosive and requires careful handling. However, there are also safer alternatives available, such as YK Glass Frosting Powder For Glass Bottles and AG GALSS ETCING POWDER FOR ACID ETCHING GLASS PRODUCTION, which are less hazardous and easier to use.


Materials and Tools You'll Need
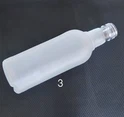
- Glass: Choose a clean, smooth glass surface for your project. You can use glass panels, bottles, or any other glass object you like.
- Etching Powder: Select a high-quality acid etching powder that is suitable for your project. As mentioned earlier, YK Glass Frosting Powder For Glass Bottles and AG GALSS ETCING POWDER FOR ACID ETCHING GLASS PRODUCTION are excellent choices.
- Masking Tape: Use masking tape to create the desired pattern or design on the glass surface. Make sure the tape is firmly adhered to the glass to prevent the etching powder from seeping under it.
- Paintbrush: A small paintbrush is useful for applying the etching powder to the glass surface.
- Gloves and Safety Goggles: Acid etching chemicals can be harmful to your skin and eyes, so it's crucial to wear protective gloves and safety goggles throughout the process.
- Plastic Container: You'll need a plastic container to mix the etching powder with water according to the manufacturer's instructions.
- Sponge or Rag: Use a sponge or rag to apply the etching solution to the glass surface.
- Water and Soap: After the etching process is complete, you'll need water and soap to clean the glass surface and remove any remaining etching powder.
Step-by-Step Guide to Creating a Shadow Effect
Step 1: Prepare the Glass Surface
- Clean the glass surface thoroughly with water and soap to remove any dirt, grease, or fingerprints. Dry the glass completely with a clean cloth.
- If you're using a glass panel, place it on a flat, stable surface. If you're working on a glass bottle or other three-dimensional object, make sure it's securely held in place.
Step 2: Create the Masking Pattern
- Decide on the pattern or design you want to create on the glass surface. You can use stencils, freehand drawing, or printed designs as a guide.
- Cut the masking tape into the desired shapes and sizes, and carefully apply it to the glass surface to create the pattern. Make sure the tape is smooth and free of wrinkles or bubbles.
- For the shadow effect, you'll need to create a gradient or transition between the etched and non-etched areas. You can do this by gradually peeling back the masking tape in a controlled manner or by using multiple layers of masking tape with different widths.
Step 3: Mix the Etching Solution
- Read the manufacturer's instructions carefully before mixing the etching powder with water. Different etching powders may have different mixing ratios and application methods.
- In a plastic container, slowly add the etching powder to the water while stirring continuously. Make sure the powder is completely dissolved in the water to form a smooth, homogeneous solution.
- Be cautious when handling the etching solution, as it can be corrosive and harmful. Wear gloves and safety goggles at all times.
Step 4: Apply the Etching Solution
- Dip a sponge or paintbrush into the etching solution and apply it evenly to the exposed areas of the glass surface. Make sure to cover the entire area with a thin, consistent layer of the solution.
- For the shadow effect, you can vary the application of the etching solution to create a gradient or transition. For example, you can apply more solution to the areas where you want a darker shadow and less solution to the areas where you want a lighter shadow.
- Allow the etching solution to sit on the glass surface for the recommended amount of time, as specified by the manufacturer. This can range from a few minutes to several hours, depending on the type of etching powder and the desired effect.
Step 5: Rinse and Clean the Glass
- After the etching time is up, carefully rinse the glass surface with plenty of water to remove the etching solution. Make sure to rinse thoroughly to remove all traces of the solution.
- Use a soft sponge or cloth to gently scrub the glass surface with water and soap to remove any remaining etching powder or residue. Rinse the glass again with clean water and dry it with a clean cloth.
Step 6: Remove the Masking Tape
- Once the glass is dry, carefully peel off the masking tape from the glass surface. You should see the desired pattern or design with a beautiful shadow effect.
- If there are any small areas where the etching solution has seeped under the masking tape, you can use a small amount of rubbing alcohol or glass cleaner to remove the residue.
Tips and Tricks for a Successful Shadow Effect
- Practice on a Small Area: Before starting your project on a large glass surface, it's a good idea to practice the shadow effect on a small piece of glass. This will allow you to experiment with different techniques and get a feel for the process.
- Use Multiple Layers of Masking Tape: To create a more subtle and realistic shadow effect, you can use multiple layers of masking tape with different widths. This will allow you to create a gradual transition between the etched and non-etched areas.
- Vary the Etching Time: The longer the etching solution sits on the glass surface, the deeper the etching will be. You can vary the etching time in different areas of the glass to create a more dynamic shadow effect.
- Experiment with Different Etching Powders: Different etching powders may produce different results, so it's worth experimenting with a few different types to find the one that works best for your project.
- Protect Your Work Area: Acid etching chemicals can be messy and corrosive, so it's important to protect your work area with a plastic sheet or newspaper. Make sure to work in a well-ventilated area to avoid inhaling the fumes.
Conclusion
Creating a shadow effect with acid etching for glass is a rewarding and creative process that allows you to transform ordinary glass into a unique and stunning work of art. By following the steps outlined in this guide and using the right materials and techniques, you can achieve beautiful results that will impress your friends, family, and customers.
As a leading supplier of Acid Etching for Glass, we offer a wide range of high-quality etching powders and supplies to help you bring your creative ideas to life. If you have any questions or need further assistance, please don't hesitate to contact us. We're here to help you every step of the way.
References
- "Glass Etching: Techniques and Applications." Glass Art Magazine, Vol. 10, No. 2, 2023.
- "The Art of Acid Etching." Craftsmanship Journal, Vol. 15, No. 3, 2022.
- Manufacturer's instructions for YK Glass Frosting Powder For Glass Bottles and AG GALSS ETCING POWDER FOR ACID ETCHING GLASS PRODUCTION.