Testing a glass etching chemical on a small area before full-scale use is a crucial step to ensure the desired results and avoid potential issues. As a supplier of Glass Etching Chemical, I understand the importance of this process. In this blog post, I'll share my insights on how to conduct a small-scale test effectively.
Why Test on a Small Area?
Before delving into the testing process, let's understand why it's necessary to test on a small area. Glass etching chemicals can have varying effects depending on the type of glass, the application method, and the environmental conditions. By testing on a small area, you can:
- Assess the Compatibility: Different types of glass, such as soda-lime glass, borosilicate glass, and tempered glass, may react differently to the etching chemical. A small-scale test helps you determine if the chemical is compatible with the specific type of glass you're working with.
- Evaluate the Etching Effect: You can observe the etching pattern, depth, and finish on a small area to ensure it meets your expectations. This allows you to make adjustments to the application process or the chemical concentration if needed.
- Minimize Waste and Cost: Testing on a small area reduces the risk of wasting large amounts of glass and chemical in case the results are not satisfactory. It also helps you avoid costly mistakes during full-scale production.
Step-by-Step Guide to Testing Glass Etching Chemical
Step 1: Select a Suitable Test Area
Choose a small, inconspicuous area on the glass surface for testing. This could be a corner or an edge of the glass that won't be visible after the final product is completed. Make sure the test area is clean and free of any dirt, grease, or fingerprints. You can clean the glass using a mild detergent and water, followed by a thorough rinse and drying with a lint-free cloth.
Step 2: Prepare the Glass Etching Chemical
Follow the manufacturer's instructions to prepare the glass etching chemical. This may involve mixing the chemical with water or other additives in the correct proportions. Wear appropriate personal protective equipment (PPE), such as gloves, goggles, and a respirator, to protect yourself from the chemical fumes and potential skin contact.
Step 3: Apply the Chemical to the Test Area
There are several methods for applying glass etching chemical, including brushing, spraying, and dipping. Choose the method that is most suitable for your project and the type of glass you're working with.
- Brushing: Dip a soft-bristled brush into the chemical solution and apply it evenly to the test area. Use a gentle, circular motion to ensure complete coverage.
- Spraying: If you're using a spray bottle, hold it about 6-8 inches away from the glass surface and spray the chemical in a fine mist. Make sure to cover the entire test area evenly.
- Dipping: If the glass piece is small enough, you can dip it into a container filled with the chemical solution. Make sure the test area is fully submerged and leave it for the recommended time.
Step 4: Monitor the Etching Process
Keep a close eye on the test area during the etching process. The time required for etching can vary depending on the type of chemical, the glass type, and the desired etching effect. Refer to the manufacturer's instructions for the recommended etching time. You may need to adjust the time based on your observations of the test area.
Step 5: Rinse and Neutralize the Chemical
Once the etching time is complete, rinse the test area thoroughly with water to remove any remaining chemical. Then, neutralize the chemical by applying a neutralizing solution, such as baking soda dissolved in water. This helps to stop the etching process and prevent any further damage to the glass.
Step 6: Evaluate the Results
After the glass has dried, examine the test area to evaluate the etching effect. Look for the following:
- Etching Pattern: Check if the etching pattern is uniform and consistent across the test area. Any streaks, blotches, or unevenness may indicate a problem with the application method or the chemical concentration.
- Etching Depth: The etching depth should be appropriate for your project. If the etching is too shallow, it may not be visible enough; if it's too deep, it may weaken the glass.
- Finish: The finish of the etched glass should be smooth and free of any rough edges or bumps. A good finish enhances the aesthetic appeal of the glass.
Step 7: Make Adjustments if Necessary
If the results of the test are not satisfactory, you may need to make adjustments to the application process or the chemical concentration. For example, you can try increasing or decreasing the etching time, changing the application method, or adjusting the chemical ratio. Repeat the testing process until you achieve the desired results.
Recommended Glass Etching Products
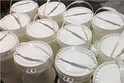
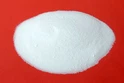
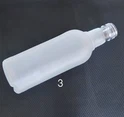
As a supplier, I recommend our Glass Etching Powder (water-based) and YK Glass Frosting Powder For Glass Bottles. These products are easy to use, environmentally friendly, and produce high-quality etching results on various types of glass.


Conclusion
Testing a glass etching chemical on a small area before full-scale use is an essential step to ensure the success of your project. By following the steps outlined in this blog post, you can minimize the risk of errors and achieve the desired etching effect. If you have any questions or need further assistance, please don't hesitate to contact us. We're here to help you with all your glass etching needs. Whether you're a professional glass artist or a DIY enthusiast, our Glass Etching Chemical products are designed to meet your requirements. Contact us today to discuss your project and explore our range of glass etching solutions.
References
- Manufacturer's instructions for glass etching chemicals
- Industry best practices for glass etching