Chemical glass etching is a fascinating process that allows us to create intricate designs and patterns on glass surfaces. As a supplier of etching glass with chemicals, I've encountered numerous challenges faced by customers, one of the most common being the stencil peeling off during the etching process. In this blog, I'll share some practical tips and techniques to prevent stencil peeling and ensure a successful glass etching project.
Understanding the Problem
Before we delve into the solutions, it's essential to understand why stencils peel off during chemical glass etching. Several factors can contribute to this issue, including improper surface preparation, poor stencil adhesion, chemical compatibility, and incorrect application techniques.

Improper Surface Preparation
A clean and smooth glass surface is crucial for stencil adhesion. Any dirt, dust, or grease on the glass can prevent the stencil from sticking properly, leading to peeling. Additionally, if the glass surface is not completely dry, the moisture can interfere with the adhesive, causing the stencil to lift.
Poor Stencil Adhesion
The quality of the stencil material and adhesive plays a significant role in preventing peeling. Low-quality stencils may have weak adhesives that don't bond well with the glass surface. Additionally, if the stencil is not applied correctly, air bubbles or wrinkles can form, creating areas where the stencil is not firmly attached.
Chemical Compatibility
The chemicals used in the etching process can also affect stencil adhesion. Some etching chemicals may be too harsh for certain stencil materials, causing them to break down or lose their adhesive properties. It's essential to choose stencils that are compatible with the specific etching chemicals you're using.
Incorrect Application Techniques
Applying the stencil incorrectly can also lead to peeling. For example, if the stencil is stretched or pulled too tightly during application, it can cause the adhesive to lose its grip. Additionally, if the stencil is not smoothed out properly, air bubbles or wrinkles can form, creating weak points where the stencil may peel.
Preventive Measures
Now that we understand the causes of stencil peeling, let's explore some preventive measures to ensure a successful glass etching project.
Proper Surface Preparation
- Clean the Glass: Start by thoroughly cleaning the glass surface with a glass cleaner and a lint-free cloth. Remove any dirt, dust, or grease from the surface. For stubborn stains, you can use a mild abrasive cleaner, but be careful not to scratch the glass.
- Dry the Glass: After cleaning, make sure the glass is completely dry before applying the stencil. You can use a clean, dry cloth to wipe away any remaining moisture or let the glass air dry.
- Degrease the Glass: If the glass has been handled with bare hands or has come into contact with oily substances, it's essential to degrease the surface. You can use a degreaser or rubbing alcohol to remove any oils from the glass.
Choose the Right Stencil Material
- Quality Stencils: Invest in high-quality stencils that are specifically designed for glass etching. Look for stencils made from durable materials with strong adhesives.
- Chemical Compatibility: Make sure the stencil material is compatible with the etching chemicals you're using. Check the manufacturer's recommendations or consult with a professional to ensure you're using the right stencil for your project.
- Size and Shape: Choose a stencil that fits the size and shape of the glass surface you're etching. If the stencil is too large or too small, it may not adhere properly or may create areas where the etching is uneven.
Apply the Stencil Correctly
- Remove Air Bubbles: When applying the stencil, start at one end and slowly smooth it out over the glass surface, using a squeegee or a credit card to remove any air bubbles. Work your way across the stencil, applying even pressure to ensure a tight bond.
- Avoid Stretching or Pulling: Be careful not to stretch or pull the stencil during application, as this can cause the adhesive to lose its grip. If you need to reposition the stencil, lift it gently from one corner and reapply it carefully.
- Smooth Out Wrinkles: If you notice any wrinkles or folds in the stencil, smooth them out immediately using a squeegee or a credit card. Wrinkles can create weak points where the stencil may peel.
Use a Stencil Adhesive
- Adhesive Spray: If you're using a stencil that doesn't have a strong adhesive, you can use an adhesive spray to help it stick to the glass surface. Make sure to choose an adhesive spray that is compatible with the stencil material and the etching chemicals you're using.
- Transfer Tape: Transfer tape can also be used to help apply the stencil smoothly and evenly. Place the transfer tape over the stencil and press it down firmly. Then, carefully lift the transfer tape and stencil together and place it on the glass surface. Smooth out the transfer tape and stencil using a squeegee or a credit card, and then peel off the transfer tape.
Protect the Stencil
- Masking Tape: Once the stencil is applied, you can use masking tape to seal the edges and prevent the etching chemicals from seeping under the stencil. Make sure to press the masking tape down firmly to create a tight seal.
- Etching Resist: If you're using a particularly aggressive etching chemical, you can apply an etching resist around the edges of the stencil to provide an extra layer of protection. Etching resist is a substance that prevents the etching chemicals from reacting with the glass surface.
Troubleshooting
Despite taking all the preventive measures, you may still encounter stencil peeling during the etching process. Here are some troubleshooting tips to help you address the issue:
If the Stencil Starts to Peel During Etching
- Stop the Etching Process: Immediately stop the etching process and remove the stencil from the glass surface. If the stencil has already started to peel, continuing the etching process may cause the stencil to come off completely and damage the glass.
- Reapply the Stencil: Clean the glass surface and reapply the stencil using the proper techniques. Make sure to smooth out any air bubbles or wrinkles and press the stencil down firmly to ensure a tight bond.
- Adjust the Etching Time: If the stencil is peeling due to the etching chemicals being too harsh, you may need to adjust the etching time. Reduce the etching time and monitor the progress closely to ensure the stencil stays in place.
If the Stencil Peels Off Completely
- Clean the Glass Surface: Remove any remaining stencil residue from the glass surface using a glass cleaner and a lint-free cloth. Make sure the glass is completely clean and dry before applying a new stencil.
- Choose a Different Stencil Material: If the stencil keeps peeling off, it may be a sign that the stencil material is not compatible with the etching chemicals or the glass surface. Try using a different stencil material or consult with a professional for recommendations.
- Seek Professional Help: If you're still having trouble preventing stencil peeling, don't hesitate to seek professional help. A professional glass etching service provider can offer expert advice and guidance on choosing the right stencils and etching chemicals for your project.
Conclusion
Preventing stencil peeling during chemical glass etching requires proper surface preparation, choosing the right stencil material, applying the stencil correctly, and protecting the stencil during the etching process. By following these tips and techniques, you can ensure a successful glass etching project and create beautiful, long-lasting designs on glass surfaces.
As a supplier of etching glass with chemicals, I'm committed to providing high-quality products and expert advice to help you achieve the best results. If you have any questions or need assistance with your glass etching project, please don't hesitate to contact us. We're here to help you every step of the way.
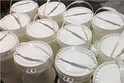
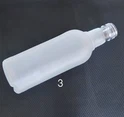
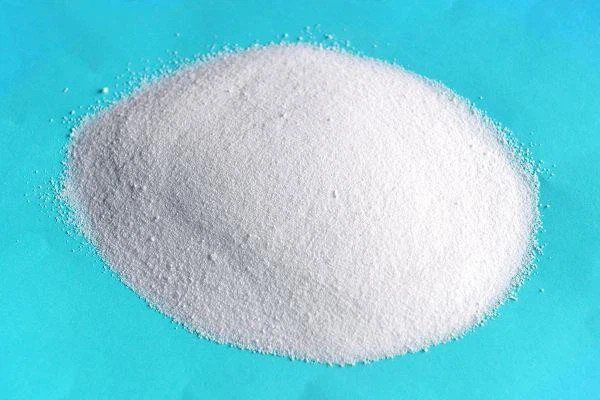
For more information about our glass etching materials, including YK Glass Frosting Powder (water-based), YK Glass Frosting Powder For Glass Bottles, and Glass Surface Chemical Etching, please visit our website or contact us directly. We look forward to working with you on your next glass etching project.
References
- Glass Etching Techniques and Tips. (n.d.). Retrieved from [Website URL]
- Choosing the Right Stencil for Glass Etching. (n.d.). Retrieved from [Website URL]
- Chemical Compatibility in Glass Etching. (n.d.). Retrieved from [Website URL]